How to Measure a Chamfer: A Guide for the Automotive and Aerospace Industries
Chamfers are essential features in the automotive and aerospace sectors, playing important roles in both functionality and aesthetics. Accurately measuring a chamfer is crucial for maintaining quality and precision in production. In this guide, we’ll break down what a chamfer is, why measuring it accurately matters, and the best ways to measure chamfers effectively in these industries.
What is a Chamfer?
A chamfer is a beveled edge that creates a smooth transition between two faces of an object, often but not always at a 45-degree angle. Chamfers are specifically designed to eliminate sharp edges, ease assembly, and improve the overall look of a product. Chamfers are found commonly on machined items like jet engine components where they are critical to reduce stress concentrations.
Image credit: https://leadrp.net/
Why Measure a Chamfer Accurately?
Accurate chamfer measurement is vital for several key reasons:
- Quality Control: Ensures that parts perform correctly and fit together properly during assembly. This is especially critical in high-stakes environments like automotive and aerospace manufacturing.
- Functionality: The size and angle of a chamfer can significantly impact performance. Inaccurate measurements can lead to mechanical failures or inefficiencies.
- Aesthetics: Keeps design uniformity, which is particularly important for consumer-facing components in the automotive industry.
- Regulatory Compliance: Many industries must adhere to strict standards, making precise measurements necessary for certification and safety.
Limitations of Traditional Measuring Tools
- Speed: The common chamfer measurement method of making a mold of the feature and measuring it using an optical comparator is quite time-consuming, often taking 15-30 minutes per feature. This adds up when the features need to be checked many times per part.
- Human Influence: Manual measurement with traditional tools is prone to human error and variation. Whether it comes from interpretation of an image on an optical comparator or reading a contact gauge, the operator taking the measurement becomes a significant contributor to measurement variation.
- Difficult to Automate: Industrial manufacturers continue to embrace automation of measurement and inspection tasks for its efficiency, consistency and cost-effectiveness but traditional methods of measuring chamfers are difficult to automate.
- Limited Data Capture: Traditional tools do not provide a digital record of measurements, making it difficult to track quality trends or ensure compliance with industry standards.
Advanced Chamfer Measurement Solutions
While traditional tools can provide decent measurements, they might not offer the level of performance and confidence that are required in high-stakes situations like aerospace or automotive manufacturing. This is where advanced measurement solutions come into play.
Introducing GapGun
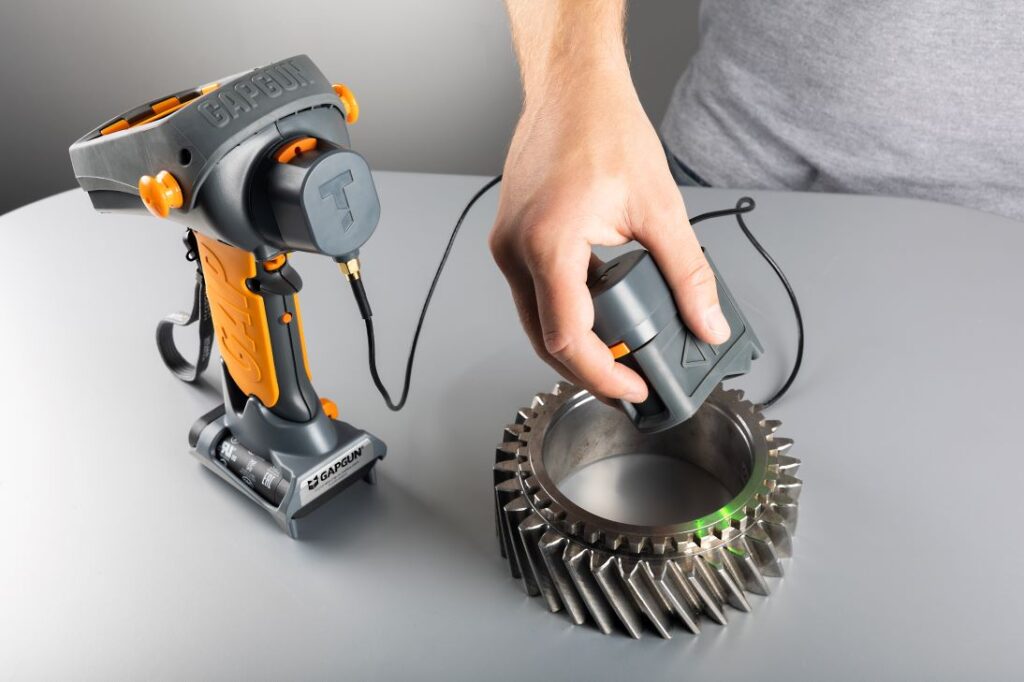
The GapGun Pro2 is a cutting-edge digital gap gauge designed specifically for precision tasks, including chamfer measurements. With its high resolution T15M sensor, GapGun Pro2 is certified for quick and accurate measurements of chamfers ranging from 0.25 mm to 1.9 mm, with bias of 15 microns or less – even on machined metallic materials.
Measuring a Chamfer Using GapGun
The process of measuring Chamfer with a GapGun is very simple and straightforward.
- Select the feature to measure (either generic Chamfer or perhaps as part of an inspection checkplan on the GapGun)
- Position the GapGun for measurement using the standoff
- Pull the trigger
The GapGun automatically captures the images, displays them on the screen, processes images to calculate the chamfer size and displays the result on the screen. When finished measuring, results are transferred to a host computer where they can be fed to your quality system and/or an inspection report can be automatically generated. Test
Benefits of Using GapGun for Chamfer Measurements
- Speed: The GapGun Pro2 has a measurement cycle of just 1-2 seconds, which significantly cuts down on time spent on quality checks.
- Accuracy: With a maximum bias of 0.015 mm (0.0006″) and standard deviation as low as 0.012 mm (<0.0005″), its readings are reliable for critical applications.
- Confidence: When GapGun performs a measurement, it actually captures multiple images of the chamfer, processes the measurements separately, checks that they are repeatable and then delivers the average of those measurements as the result. This ensures that users can have high confidence in the chamfer measurement results from GapGun
- Ease of Use: The touch screen interface makes navigation through measurement checkplans straightforward, even for operators with minimal training.
- Digital Audit Trail: It captures measurements digitally, ensuring traceability and compliance with industry standards.
- Versatility: The GapGun can be deployed for manual and automated measurement. It is useful for various applications beyond chamfers such as radius, break edge, gap, step, angle and others, making it a smart investment for manufacturers.
Contact Accurex
Accurate measurement of chamfers is essential for maintaining quality and performance in automotive and aerospace manufacturing processes. Whether you’re using hand tools, optical comparator, or advanced tools like the GapGun Pro2, knowing how to measure correctly will save you time and resources in the long run. For those seeking speed and precision in their measurements, consider integrating the GapGun into your processes—it’s designed to meet modern manufacturing demands while providing reliable results every time.

